Follow these steps to get a YOUnite deployment up and running as quickly as possible on your local system. If greater detail about YOUnite is needed, please see the Knowledge Base.
Requirements
The steps below make reasonable assumptions about the reader’s IT skills.
|
Important
|
The YOUnite stack will not run properly with an under-configured system. |
-
Request
AWS ECR access credentialsfor YOUnite’s Docker container registry — make requests to . Store the credentials in a
 safe place. -
Install the following making sure that
aws,docker,curl,tarandpythonare all on your command path:Tool Minimum Version Download Link AWS CLI
2.0
Docker Desktop
latest
Docker Desktop. This includes Docker Compose 2.x or later.
curl
Usually included with all operating systems including Windows / Mac
tar
Usually included with all operating systems including Windows / Mac
python
3.7+
-
To run the entire YOUnite Stack of services on a single system, it must meet the following minimums:
-
RAM: 16 GB minimum. 32 GB is recommended, especially if planning on running the YOUnite Biz Demo.
-
Storage: Make sure you have at least 75GB free space (anticipate swapping).
-
CPU: Quad Core i7 or equivalent
-
Available Ports: The following ports must be free on your system:
Service Port YOUnite UI
80
YOUnite Server
8080
YOUnite Notification Service
8082
YOUnite Data Virtualization Service
8084
Apache Artemis (message bus)
61613, 61616, 8161
PostgreSQL (YOUnite Server, Data Virtualization Service)
5432
PostgreSQL (Notification Service)
5433
OpenSearch (open source Elastic)
9200
Logstash
4560
OpenSearch Dashboard / (open source Kibana)
5601
Keycloak
8800
-
-
Docker must also be configured with the following minimums (see Setting Resources on Docker Desktop):
-
CPUs: The recommended value is all available CPUs. Minimum is 4 CPUs.
-
Memory:
Total System Memory Configure Docker 16GB
8GB or 12GB if planning on running the Biz Demo.
Note: The Biz Demo will NOT run without a minimum of 12GB.
32GB or higher
16GB (recommended if planning on running the Biz Demo).
-
Swap: The recommended value is 25% of total system memory. Minimum is 2GB.
-
Disk Image Size: At least 50GB.
-
Setting Resources on Docker Desktop
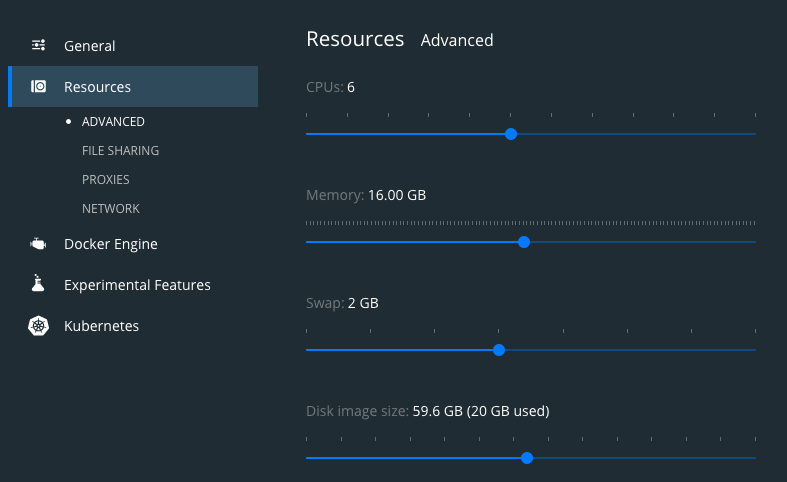
In Docker Desktop, go to Settings (Windows) or Preferences (Mac) and select Resources. Here you can set the CPUs, Memory, and Swap allocated to Docker:

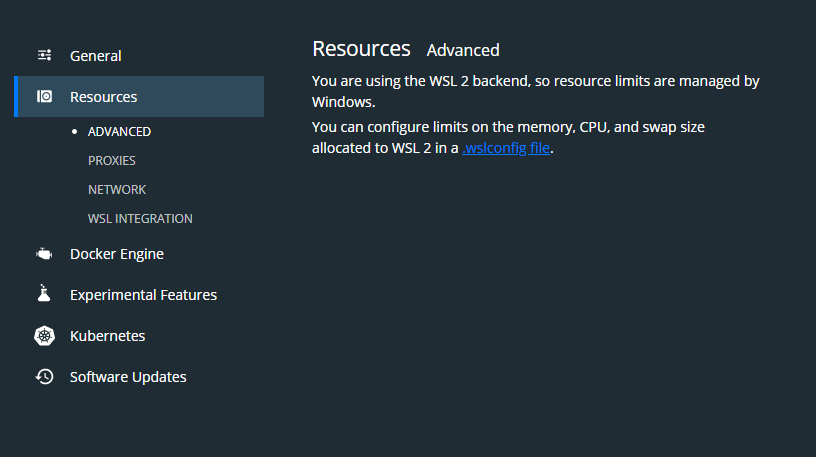
If your resources setting page looks like this instead (Windows only), you will need to configure memory usage in a settings file:

Open a Powershell window and run the following command:
wsl --shutdown
notepad "$env:USERPROFILE/.wslconfig"
If the file does not yet exist, create it. Add the following to the file:
[wsl2]
memory=12GB  # Memory limit - default is 50% of total memory (80% on builds before 20175)
processors=4 # Processors - default is the total number of processors
swap=4GB     # Swap size - default is 25% of total memory
After updating the file, restart Docker Desktop.
See https://docs.microsoft.com/en-us/windows/wsl/wsl-config#global-configuration-options-with-wslconfig for more
information about configuration options for .wslconfig.
Verifying Docker Resources
Run the following command and look for Total Memory to verify docker has been configured with enough RAM:
docker system info
Configuration
Before starting the stack, the following configuration must be performed:
-
Create a new, empty folder for downloaded files to go. This is referred to as the
working directoryin this document. -
Open a shell and navigate to the working directory.
-
Configure AWS CLI Credentials:
Get the
AWS ECR access credentialsfrom yoursafe placeand run the following:NoteIf you already have the AWS CLI configured, you can create multiple profiles. See AWS' Quickly configuring the AWS CLI. aws configure-
Use the
Access key IDandSecret access keyfrom the providedAWS ECR access credentials -
Use
us-west-2as theDefault region name -
Any output format is acceptable
-
-
Download this Local Stack Quickstart Scripts (
local-stack-scripts.zip) to your working directory and unzip the file. -
Make sure docker (or Docker Desktop for Windows / Mac) is started on your local system.
-
Add the following entry to your
hostsfile (if you need help see this page on how to edit your host file):127.0.0.1 local.younite.org
Starting the Stack
|
Note
|
If there is a need to remotely access YOUnite services such as the YOUnite UI or Kibana using a web browser then see the notes on configuring YOUnite for remote access. |
-
Go into the
scriptsfolder in your working directory (created whenlocal-stack-scripts.zipwas unzipped). -
Run the "start" script for your operating system.
# For Mac OS X / Linux: chmod +x *.sh ./start.sh # For Windows command prompt / powershell start.cmd -
This script will first remove any running containers before bringing up the stack. It will take several minutes to start the YOUnite stack — when the stack is ready you will see the following message:
SUCCESS! The stack is ready to go.
Running the Biz Demo
If running the biz demo (Biz Demo), wait for the stack to start and then run the start-biz-demo script:
# OS X, Unix or Linux:
./start-biz-demo.sh

# Windows command prompt / powershell:
start-biz-demo.cmd
Stopping the Stack
-
Go into the
scriptsfolder in your working directory (created by unzipinglocal-stack-scripts.zip). -
Run the
stopscript for your operating system.# OS X, Unix or Linux: ./stop.sh # Windows command prompt / powershell: stop.cmdThis will also stop the biz demo, if running.
Logging in to the User Interface
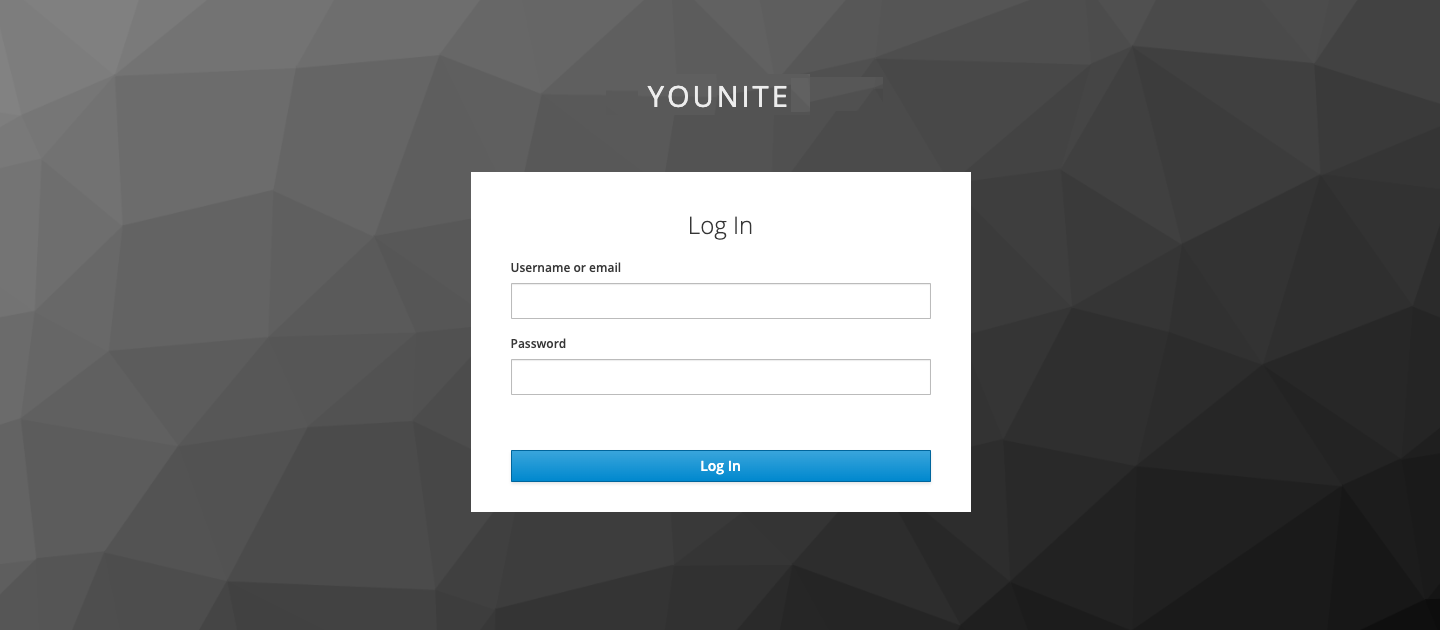
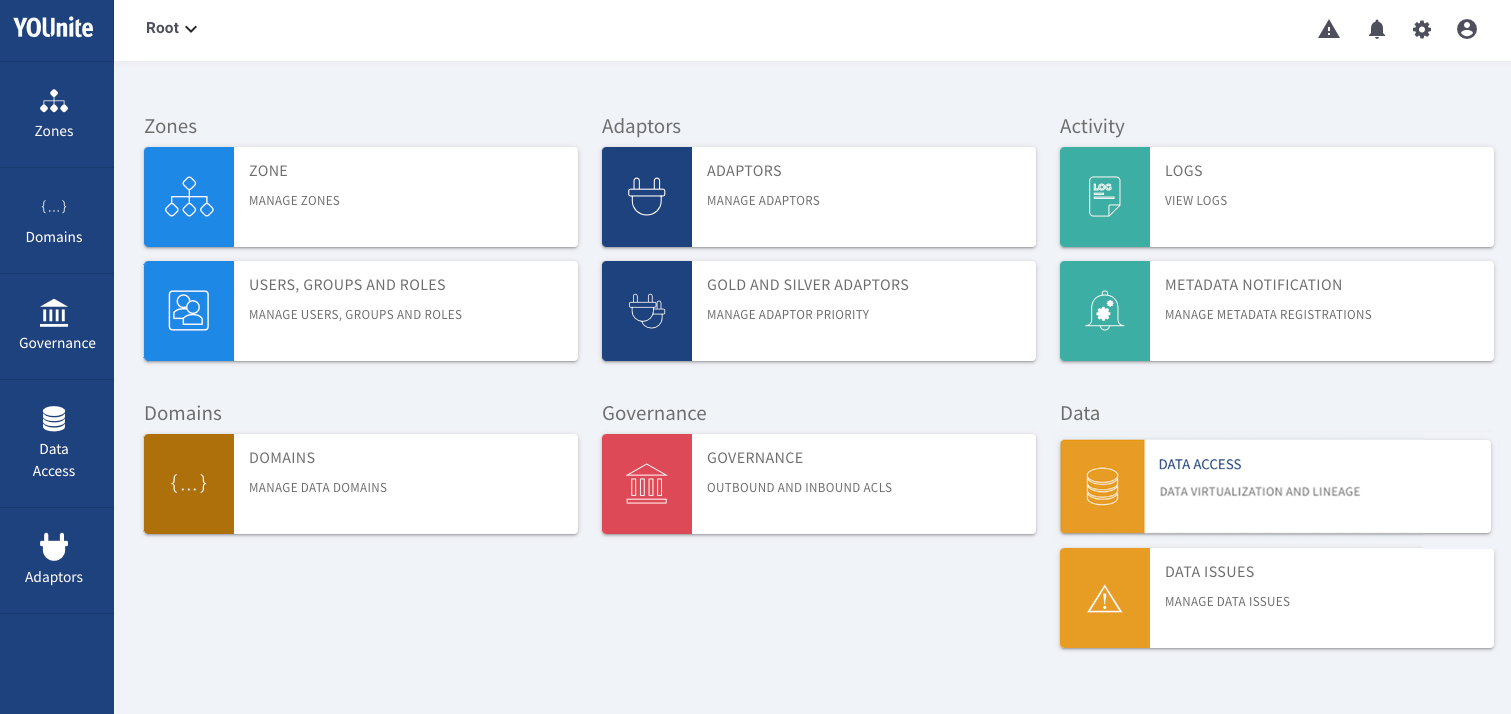
From your browser, go to the following URL and login as either the admin or dgs (data governance steward). The default password for both is password:
http://local.younite.org
|
Note
|
You may need to use Chrome or Firefox and depending on the local network settings you many need to enter Incognito mode. |


Advanced Options
There are two alternate options for starting the stack: start-minimal and start-notifications. These options allow
starting a stack of reduced size (ie reduced memory consumption) by omitting some services. Both of these alternate
options do not include elastic logging and therefore some features, including lineage of data records will be disabled.
The minimal option also does not include the notifications service which may lead to degraded results with the user
interface and webhook notifications will be disabled.
Manage the YOUnite Stack
Using Docker and Docker Compose
A short-list of useful docker and docker compose commands include:
-
See the names and running state of the containers in the YOUnite Stack:
docker ps
-
Stop all the containers in the YOUnite Stack (must run this from the directory where
docker-compose.ymlresides):docker compose down -v
-
View the logs in a container. Get the container name (see
docker psabove) then, using theyounite-dbcontainer as an example, issue the following:docker logs younite-db docker logs --tail 100 younite-db
-
Login to a container. Using the
younite-apicontainer as an example:docker exec -it younite-api /bin/bash
-
Clean up the docker environment (remove unused images, containers, volumes):
docker system prune
docker volume prune
See the Docker and Docker Compose documentation for more.
Where to go Next
For more, see the First Steps for Zone Admins and Data Governance Stewards guide.
— or —
If you want to dive right in and create zones, domains and adaptors and start performing federated data operations with test data, see the Biz Demo guide.
Troubleshooting Stack Start Up
The following are some troubleshooting tips for checking that each service in the stack is running:
Troubleshooting Docker
One of the most common causes of failure of the YOUnite stack is lack of memory or disk space. Ensure that the Docker configuration is correct and that the hard drive with docker on it is not out of memory.
It’s not always apparent that this is the case, but things like containers stopping or restarting unexpectedly is one sign. Sometimes a docker container may also give a hint that it cannot allocate memory or disk space.
Checking Available Memory
To see how much memory Docker has available, run the following command and look for the line Total Memory:
docker system info
Freeing up Docker Disk Space
Docker may run out of disk space over time via normal usage. To free up space run the following commands, which will remove orphaned containers and volumes:
docker system prune
docker volume prune
Verify all Docker Containers are Running
docker ps -a
The output should look like this and each service should have of a status of Up x minutes. If any have a status of
Exited then there is a problem. Check the logs of the container to see why it exited.
CONTAINER ID   IMAGE                                                                                      COMMAND                  CREATED         STATUS         PORTS                                                                                                                                                                             NAMES
7f04abeec46a   160909222919.dkr.ecr.us-west-2.amazonaws.com/younite/youniteui:latest                      "/docker-entrypoint.…"   2 minutes ago   Up 2 minutes   0.0.0.0:80->80/tcp, :::80->80/tcp                                                                                                                                                 younite-ui
e6e816be941a   postgres:12                                                                                "docker-entrypoint.s…"   4 minutes ago   Up 4 minutes   0.0.0.0:5433->5432/tcp, :::5433->5432/tcp                                                                                                                                         younite-notification-service-db
e005f68ac724   160909222919.dkr.ecr.us-west-2.amazonaws.com/younite/activemq-artemis:2.18.0               "/docker-run.sh run"     4 minutes ago   Up 4 minutes   1883/tcp, 5445/tcp, 5672/tcp, 0.0.0.0:8161->8161/tcp, :::8161->8161/tcp, 0.0.0.0:61613->61613/tcp, :::61613->61613/tcp, 9404/tcp, 0.0.0.0:61616->61616/tcp, :::61616->61616/tcp   younite-mb
ee99c91e67f4   160909222919.dkr.ecr.us-west-2.amazonaws.com/younite/younite-api:latest                    "/bin/sh -c 'exec ja…"   4 minutes ago   Up 4 minutes   0.0.0.0:8080->8080/tcp, :::8080->8080/tcp                                                                                                                                         younite-api
e91dc0f59d66   postgres:12                                                                                "docker-entrypoint.s…"   4 minutes ago   Up 4 minutes   0.0.0.0:5432->5432/tcp, :::5432->5432/tcp                                                                                                                                         younite-db
8ff594114f35   160909222919.dkr.ecr.us-west-2.amazonaws.com/younite/younite-notification-service:latest   "/bin/sh -c 'exec ja…"   4 minutes ago   Up 4 minutes   0.0.0.0:8082->8080/tcp, :::8082->8080/tcp                                                                                                                                         younite-notification-service
32acedf65840   160909222919.dkr.ecr.us-west-2.amazonaws.com/younite/younite-kibana:latest                 "/usr/local/bin/kiba…"   5 minutes ago   Up 5 minutes   0.0.0.0:5601->5601/tcp, :::5601->5601/tcp                                                                                                                                         younite-kibana
ee9ad58735c4   160909222919.dkr.ecr.us-west-2.amazonaws.com/younite/younite-logstash:latest               "/usr/local/bin/dock…"   5 minutes ago   Up 5 minutes   5044/tcp, 0.0.0.0:4560->4560/tcp, :::4560->4560/tcp, 9600/tcp                                                                                                                     younite-logstash
3c0620778383   160909222919.dkr.ecr.us-west-2.amazonaws.com/younite/younite-elastic:latest                "/usr/local/bin/cust…"   6 minutes ago   Up 6 minutes   9300/tcp, 9600/tcp, 0.0.0.0:9200->9200/tcp, :::9200->9200/tcp, 9650/tcp                                                                                                           younite-elastic
965c600636f2   160909222919.dkr.ecr.us-west-2.amazonaws.com/younite/keycloak:14.0.0                       "/opt/jboss/tools/yo…"   6 minutes ago   Up 6 minutes   8443/tcp, 0.0.0.0:8800->8080/tcp, :::8800->8080/tcp                                                                                                                               younite-keycloak
Verify that Services are Healthy
| Service | Command | Expected Result |
|---|---|---|
YOUnite Server |
|
|
YOUnite Notification Service |
|
|
YOUnite Data Virtualization Service |
|
|
YOUnite UI |
curl http://localhost (or attempt to log in via web browser) |
HTML of the web page |
Apache Artemis (message bus) |
Go to http://localhost:8161/console in your web browser Username = artemis Password = artemis |
The Current Status page should indicate that the Broker is up and running |
PostgreSQL databases |
Use Port = 5432 (YOUnite Server), 5433 (Notification Service) Database = younite (YOUnite Server), notifications (Notification Service) Username = younite Password = younite |
Database is up and running |
Elastic, Logstash, Kibana |
log in to Kibana: http://localhost:5601 username = admin password = password If Kibana is not working, check elastic: curl -k https://elastic:admin@localhost:9200/_cluster/health If events are arriving in elastic, logstash is working |
Kibana is working / curl command gives healthy status |
Keycloak |
Log in to admin console: http://localhost:8800/auth/admin/master/console Username = admin Password = admin |
Admin console is working |