Follow these steps to get a YOUnite Cluster up and running using Docker and Kubernetes inside your Amazon Web Services (AWS) account.
|
Note
|
If this is deployment is for a production environment see the AWS Deployment Guide and contact your YOUnite System Integrator or Partner. |
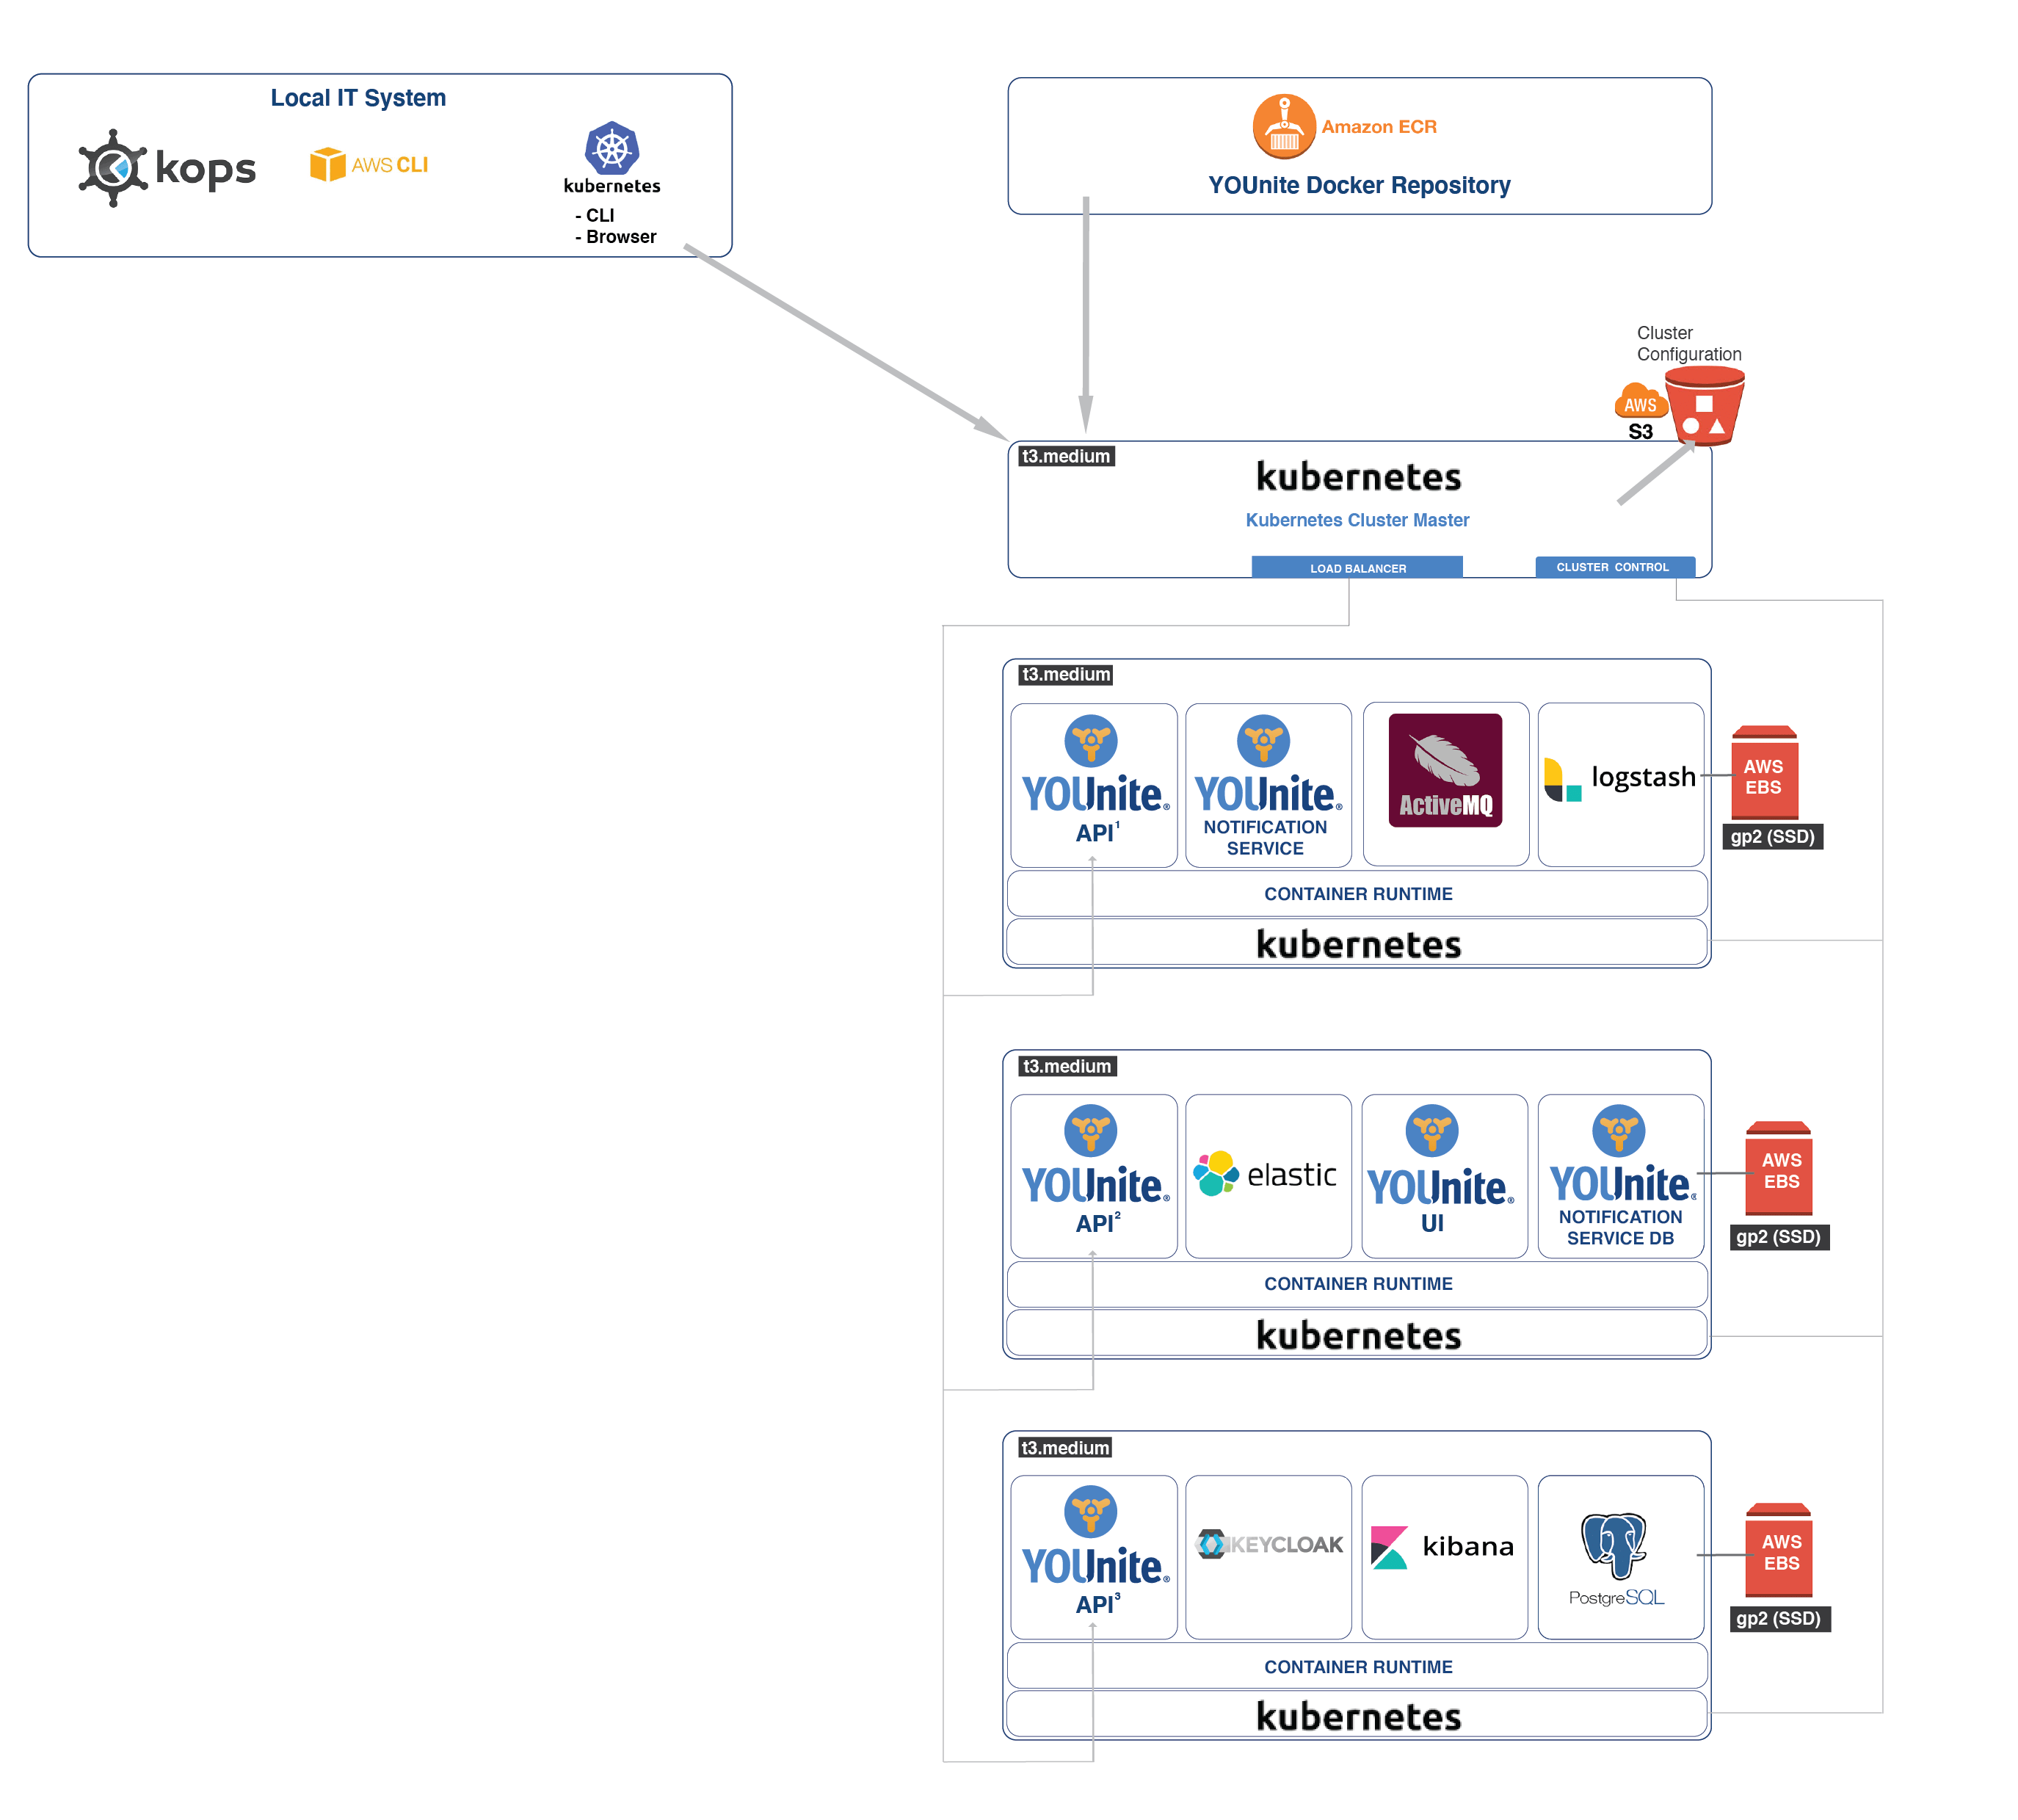
This is what we’ll be building:
|
Important
|
To avoid conflicts with existing AWS and Kubernetes accounts and live/production services, it is advisable to create a separate AWS Account when testing any service. |
If greater detail about YOUnite is needed, please see the YOUnite Data Fabric and the Knowledge Base.
Time Required to Complete a Deployment
The duration of these steps should not exceed three hours, contingent on the speed at which your DNS provider propagates DNS changes. This timeframe also depends on whether you possess direct access to update CNAME records in your organization’s DNS maps or if you must submit a request for such changes.
|
Note
|
This is the time required to deploy. Implementation planning including data domains and adaptors is outside the scope of this document. |
Skills Background
-
The tasks in this document make reasonable assumptions about the reader’s:
-
Docker image, container and network management
-
Linux System Administrator(SA)/IT AWS SA Skills.
-
AWS SA Skills should include familiarity with:
-
S3 Buckets
-
IAM User permissions
-
AWS ECR Access
-
AWS CLI
-
VPCs
-
AWS Certificate Manager
-
-
-
This guide walks the user through Kubernetes and KOPS commands but familiarity with these technologies will make the deployment easier
Prerequisites
-
S3 Bucket
-
Two IAM Users w/AWS Keys and a Shell Window for Each
-
A Password Manager
Steps:
-
Administrative access to your organization’s DNS CNAME map. If you do not, then a request will be need to be made to the appropriate IT staff to make the update. This will delay the completion of the deployment.
-
Write access to an S3 Bucket
-
Access keys to the YOUnite ECR repo (to retrieve YOUnite’s docker images)
-
Windows users will probably find it helpful to have a Unix/Linux environment installed such as Microsoft WSL.e
-
A password manager or encrypted file to store keys, records, certificates, DNS information, etc. Throughout this document this will be referred to as the
safe place. -
Two IAM users will be required to complete this setup. Much of the configuration is done in a shell terminal window on a local
SA System. It is important that each user run in its own shell window to make managing access keys easier:-
An AWS IAM user that will act as the Cluster Administrator (
Cluster SA) for the AWS account the YOUnite Kubernetes cluster will run in. The shell window this user runs in will be called theCluster SA Shell. -
An AWS IAM User that has been created by YOUnite and granted access permission to the YOUnite AWS ECR (Elastic Container Repository) where the YOUnite Docker images reside. The user is referred to as the
ECR Userand it should run in a separate shell window that will be referred to as theECR User Shell.-
To request an IAM User Account and access keys for the YOUnite AWS ECR, contact:

-
You will receive the two keys:
Access Key IDandSecret access key. Store them in yoursafe placeand label as `AWS ECR User Keys. For example:AWS ECR User Keys Access key ID: AKIACCDDEEFFGGHHIIJJ Secret access key: 000111DDDccchDDDEEEE333777777QXHj8T
-
-

Local SA System Software
The following steps will guide you through loading the following on your local SA system:

-
Using your
Cluster SA shell, load the following tools onto yourLocal SA Systemand add them to your shell path. Make sure that Kubernetes is installed beforeKops:
Tool |
command |
Description |
Minimum Version |
Download Link |
AWS CLI |
|
Interact with your AWS environment. |
2.0 |
|
Kubernets Command Line Tool |
|
Cluster controller |
1.18 |
|
Kops |
|
Kubernetes operations tool |
1.16 |
Validate
Make sure the commands are available to both the Cluster SA Shell and the ECR User Shell. Run the following from both shells:
$ aws --version
aws-cli/2.0.6 ....
$ kubectl version
Client Version: version.Info{Major:"1", Minor:"18", GitVersion:"v1.18.0" ....
$ kops version
Version 1.16.0Cluster Admin AWS (SA) Policies and Policy Group
Create or update an IAM user in your AWS account with the following policies if one does not already exist:
    AmazonEC2FullAccess
    AmazonRoute53FullAccess
    AmazonS3FullAccess
    IAMFullAccess
    AmazonVPCFullAccess
    AmazonSQSFullAccess
    AmazonEventBridgeFullAccess
    AWSCertificateManagerPrivateCAFullAccess or AWSCertificateManagerFullAccess
AWS CLI commands for this user will be invoked from the Cluster SA Shell.
See the Creating an AWS Cluster Administrator guide if you are unclear about how to create the AWS IAM user with the above privileges.
Note that if an IAM user doesn’t have the AWSCertificateManagerPrivateCAFullAccess or AWSCertificateManagerFullAccess policy, then a request will need to be made to an IAM user that has one or both of these policies.
Configure AWS Account Credentials On Your Local SA System in the Cluster SA Shell
|
Important
|
Users that already have the AWS CLI tools running on their local systems will need to manage their AWS profiles (IAM users). See: http://docs.aws.amazon.com/cli/latest/userguide/cli-chap-configure.html#cli-quick-configuration-multi-profiles |
-
Retrieve the
AWS Access Key IDandAWS Secret Access Keyfor your AWSCluster SAIAM user: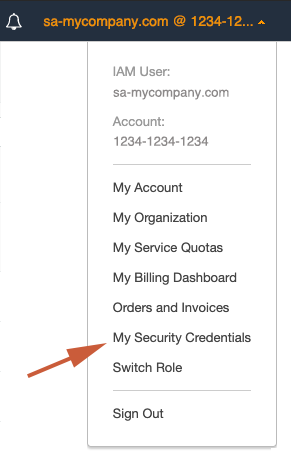
Store them your
safe placeand label them asAWS Cluster SA Keys:AWS Cluster SA Keys Access key ID: AKIAZZYYXXWWVVUUTTSS Secret access key: mfmfk5eX33JKFz5FzHLG4ktJ17DGjxzWWWWWBnnnn -
Then, using the keys you just stored, run the
aws configurecommand from yourCluster SA Shellfollowing the AWS Quickly Configuring the AWS CLI section:
Validate
Validate you are logged in as the Cluster SA AWS IAM User created above. From the Cluster SA Shell run the following:
aws iam get-userAnd that you have the appropriate privileges. The response for each should include True:
aws iam get-policy --policy-arn arn:aws:iam::aws:policy/AmazonEC2FullAccess
aws iam get-policy --policy-arn arn:aws:iam::aws:policy/AmazonRoute53FullAccess
aws iam get-policy --policy-arn arn:aws:iam::aws:policy/AmazonS3FullAccess
aws iam get-policy --policy-arn arn:aws:iam::aws:policy/IAMFullAccess
aws iam get-policy --policy-arn arn:aws:iam::aws:policy/AmazonVPCFullAccess
aws iam get-policy --policy-arn arn:aws:iam::aws:policy/AmazonSQSFullAccess
aws iam get-policy --policy-arn arn:aws:iam::aws:policy/AmazonEventBridgeFullAccess

aws iam get-policy --policy-arn arn:aws:iam::aws:policy/AWSCertificateManagerPrivateCAFullAccess
-- or --
aws iam get-policy --policy-arn arn:aws:iam::aws:policy/AWSCertificateManagerFullAccess
Backup Existing Kubectl Configs
If you already use kubectl on your local system, backup your Kubectl configuration files (e.g. $HOME/.kube/config) that you might already be using.
More on how to manage multiple clusters can be found here Configuring Access to Multiple Kubernetes Clusters
Steps
If the AWS CLI, Kops and Kubernetes are installed with the correct AWS credentials for the Cluster SA IAM user, we can begin creating our scalable YOUnite cluster with Kubernetes.
Set Configuration Params as Shell Variables
From the Cluster SA Shell set the following:
| Shell Variable | Description |
|---|---|
KOPS_STATE_STORE |
The configuration bucket name and must conform to AWS S3 Bucket Restrictions and Limitations. |
NAME |
The cluster name and must end with |
AWS_ACCESS_KEY_ID |
The |
AWS_SECRET_ACCESS_KEY |
The |
Store the KOPS_STATE_STORE and NAME in your safe place
For example:
export KOPS_STATE_STORE=s3://my-company-younite-state-store
export KOPS_CLUSTER_NAME=my-company-younite.k8s.local
export KUBECONFIG=$HOME/.kube/config.my-company-younite.k8s.local
export AWS_ACCESS_KEY_ID=CL23456789CL23456789
export AWS_SECRET_ACCESS_KEY=cl23456789cl23456789cl23456789cl23456789
Create the AWS S3 Bucket
From the Cluster SA Shell create the S3 bucket.
This S3 bucket will contain the cluster’s configuration.
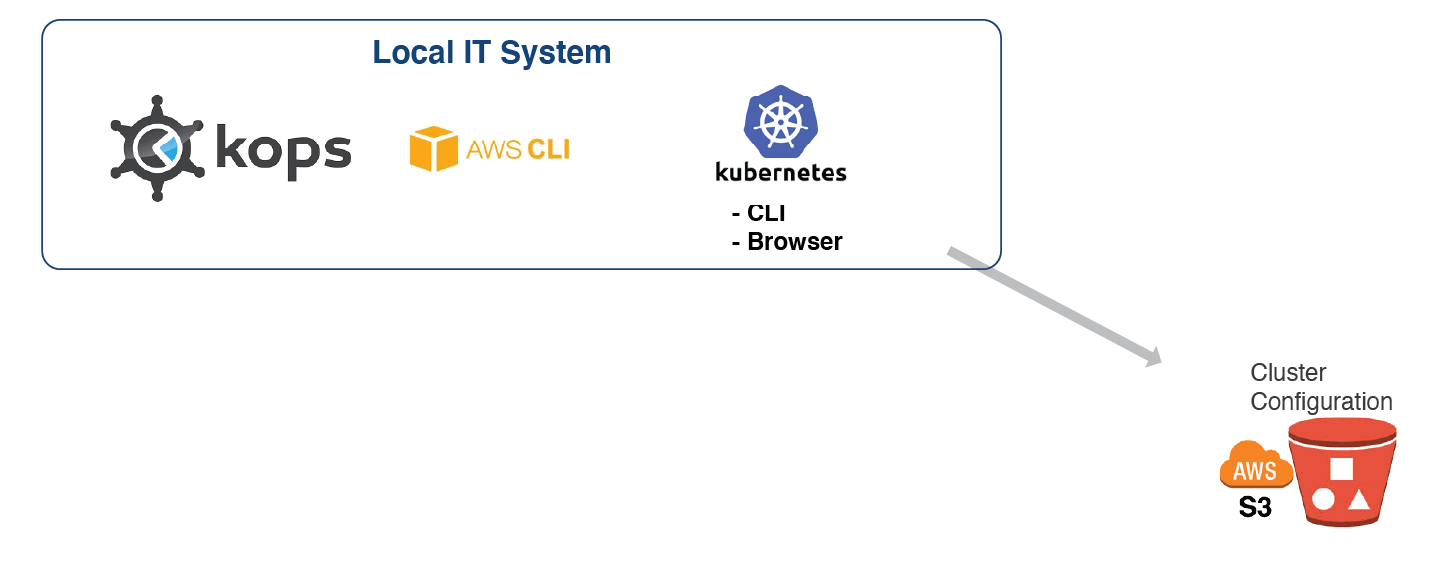
To create the S3 bucket use the following or, alternatively, use the --profile
aws s3 mb $KOPS_STATE_STORE --region us-east-1OR
aws s3 mb $KOPS_STATE_STORE --region us-east-1 --profile youniteValidate the S3 bucket was created:
aws s3 ls2020-04-16 11:40:05 younite-state-storeCreate and Start the Kubernetes Cluster

From the Cluster SA Shell, create the cluster:
kops create cluster --zones=us-west-2a --name=$KOPS_CLUSTER_NAMEIncrease the number of nodes in the cluster to 3 (or more):
kops edit ig --name $KOPS_CLUSTER_NAME nodes-us-west-2aset both the maxSize and minSize to 3 and save the file.
Update the cluster:
kops update cluster --name=$KOPS_CLUSTER_NAME --yesInspect the cluster:
kops edit cluster --name=$KOPS_CLUSTER_NAMEThis will take several minutes.
Wait fo the Cluster to Startup
First, update your local credentials otherwise you may run into unauthorized errors:
kops export kubecfg --adminRun:
kops validate clusterWhile the cluster is not ready, the above command will return unexpected error during validation: or similar messages.
When kops validate cluster returns the following, it is ready:
Validating cluster my-company-younite.k8s.local

INSTANCE GROUPS
NAME			ROLE	MACHINETYPE	MIN	MAX	SUBNETS
master-us-west-2a	Master	m3.medium	1	1	us-west-2a
nodes			Node	t2.medium	3	3	us-west-2a

NODE STATUS
NAME						ROLE	READY
ip-172-20-34-121.us-west-2.compute.internal	node	True
ip-172-20-45-122.us-west-2.compute.internal	node	True
ip-172-20-49-227.us-west-2.compute.internal	node	True
ip-172-20-60-159.us-west-2.compute.internal	master	True

Your cluster my-company-younite.k8s.local is ready
Check that kubectl is connecting to the cluster. This may take several minutes:
kubectl get nodesNAME STATUS ROLES AGE VERSION
ip-172-20-34-121.us-west-2.compute.internal Ready node 23s v1.16.8
ip-172-20-45-122.us-west-2.compute.internal Ready node 23s v1.16.8
ip-172-20-49-227.us-west-2.compute.internal Ready node 31s v1.16.8
ip-172-20-60-159.us-west-2.compute.internal Ready master 25s v1.16.8Add ECR Secret to the Cluster Docker Registry
|
Important
|
Perform the aws ecr get-login-password from the ECR User Shell to avoid conflicts with the ECR and Cluster IAM users.
|
From the ECR User Shell retrieve a temporary password.
This step adds a temporary password for your ECR user to the cluster’s docker-registry so it can download the YOUnite docker images.
Get the AWS ECR User Keys from your safe place and use Access key ID and Secret access key to set the following:
export AWS_ACCESS_KEY_ID=AKIACCDDEEFFGGHHIIJJ
export AWS_SECRET_ACCESS_KEY=000111DDDccchDDDEEEE333777777QXHj8T
Run the following to get a very long AWS ECR temporary password:
aws ecr get-login-password --region us-west-2Navigate away from the ECR User Shell and back to the Cluster SA Shell, then add the password to the Cluster Docker Registry.
To add it to the cluster’s docker-registry run the following substituting the password with the string really-long-password-goes-here. Also, use any email you want or the dummy email shown below.
kubectl create secret docker-registry younite-registry --docker-server=https://160909222919.dkr.ecr.us-west-2.amazonaws.com --docker-username=AWS --docker-password=really-long-password-goes-here --docker-email=notused@younite.usValidate that the password was added to the docker-registry:
kubectl get secret younite-registry --output=yaml|
Note
|
This ECR password is good for only 12 hours. To create a new password run kubectl delete secret younite-registry (from Cluster SA Shell) and then re-run the steps in this section.
|
Select a Basename URL for Your Cluster
Decide on a basename URL for your cluster. This URL will be part of several CNAME records that need to be added to your organization DNS CNAME map.
The URL should be in the format <unique-sub-path>.<organization-url> (do not include http and https).
For example:
younite.my-company.comWhere younite is the <unique-sub-path> and my-company.com is the <organization-url>.
Save this to your safe place as Basename URL:
Basename URL: younite.my-company.comCreate an AWS Certificate
Login to the AWS account associated with this cluster and request a certificate.
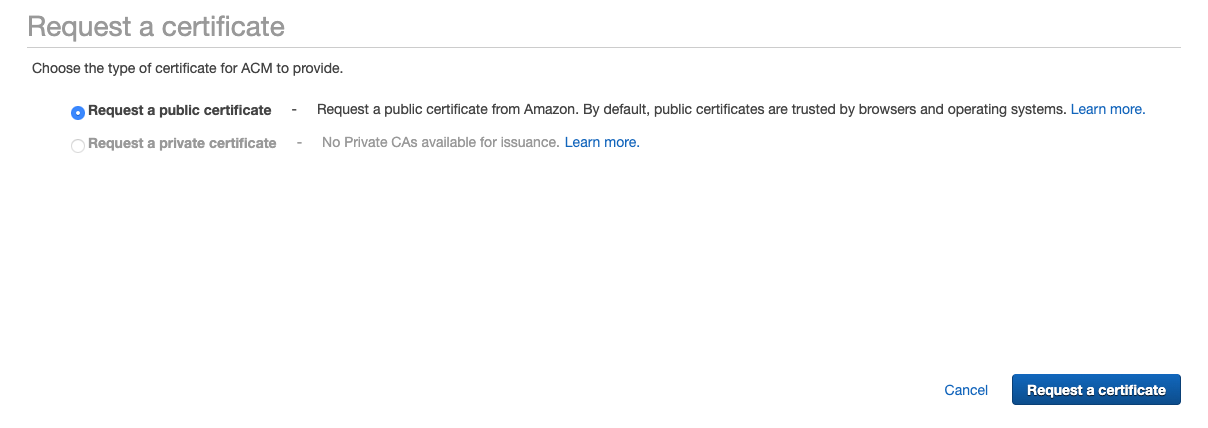
To request a certificate, navigate to the Certificate Manager page and select Request a certificate.
Select Request a public certificate:
Enter the domain name by prepending a *. to the Basename URL stored in your safe place. For example:
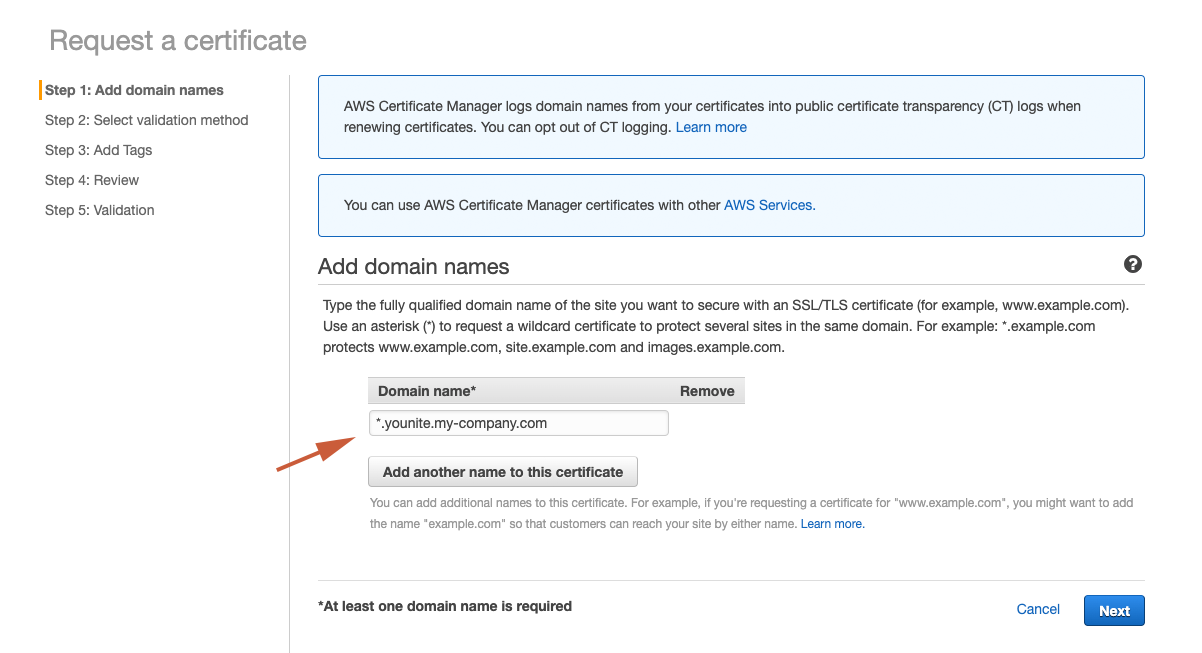
Select DNS validation:
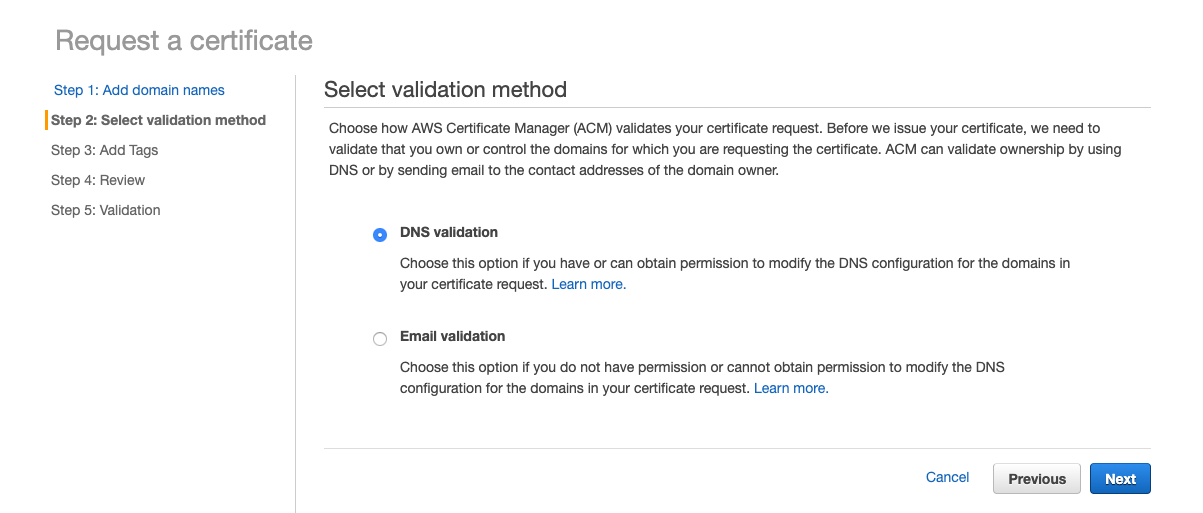
Skip the Add Tags page.
On the Request a certificate page review the entries and if it looks OK, select Confirm and request.
You should get a Request in progress screen. Expand the certificate and copy the CNAME Name and Value to a safe place as YOUnite Service CNAME. It will be used later in the YOUnite Service CNAME section below:

The Validate status will be Pending validation in orange font (see above).
Copy the certificate’s ARN to your safe place as AWS Cert ARN:
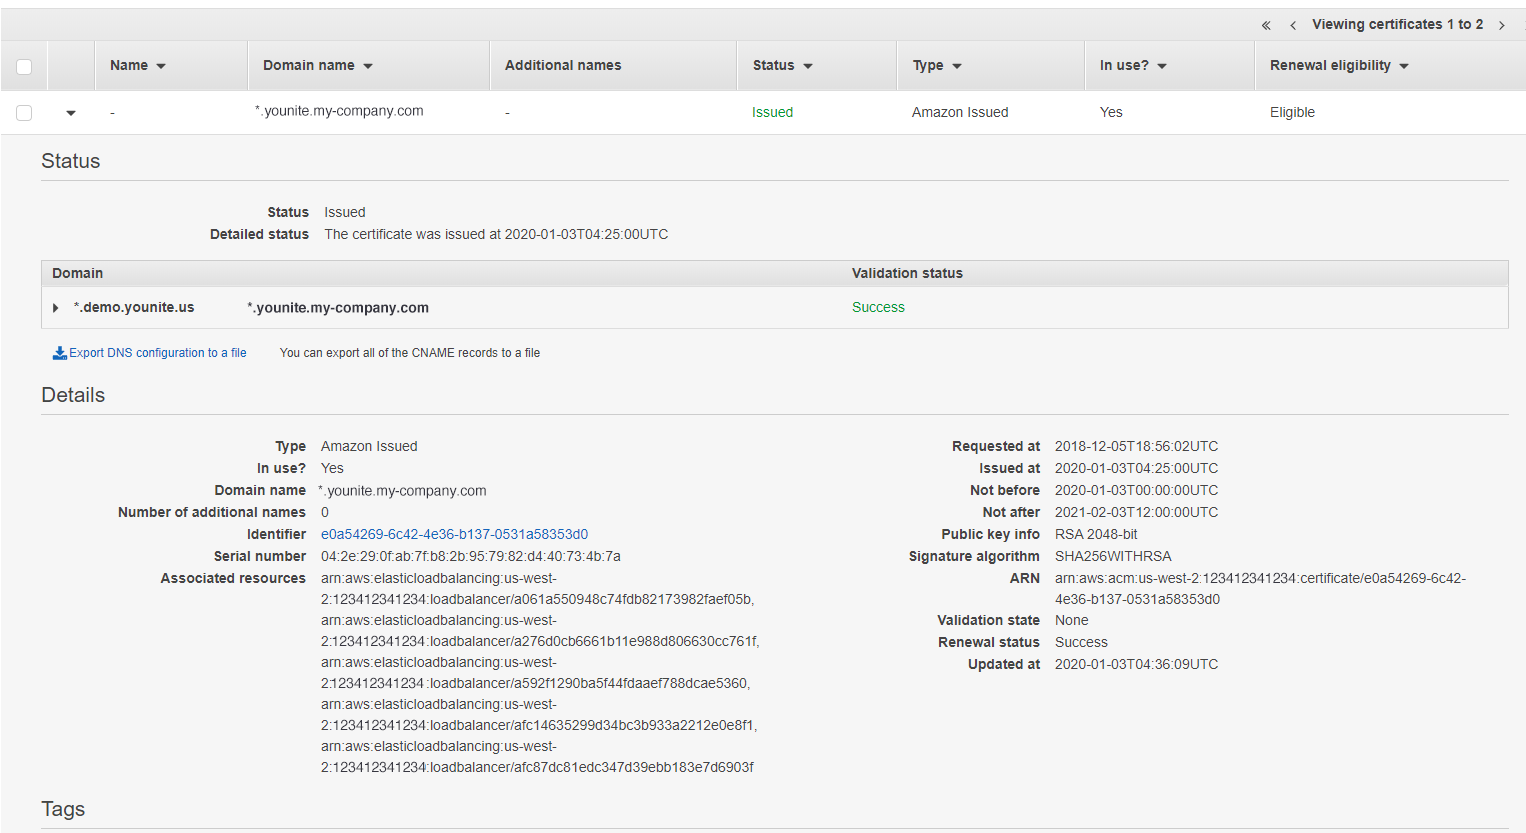
Once it turns green and says Issued the certificate is valid.
Apply Configuration Files to the Kubernetes Cluster
Create the pods (containers) in our kubernetes cluster.

Download Configuration Files and Scripts
Download the cluster configuration tarball. Then, from the Cluster Admin Shell, unpack it then change directories to the specs directory:
tar xvfZ kuber-config.tar.Z
cd specs|
Important
|
Keep specs in a safe location. It is used when the cluster configuration needs to be updated.
|
Set the Cluster’s Basename URL and SSL Certificate in the cluster-props.env File
From the specs directory in your Cluster Admin Shell, edit the cluster-props.env file and set:
* base_url to the value stored as Basename URL in your safe place
* ssl_cert to the
| Shell Variable | Value to Use | Example |
|---|---|---|
base_url |
The |
|
ssl_cert |
The |
|
namespace |
Use |
|
For example:
vi cluster-props.envbase_url=younite.my-company.com
.
.
ssl_cert=arn:aws:acm:us-west-2:123412341234:certificate/e0a54269-6c42-4e36-b137-8353d0Save the file.
Set Secrets
The default administrator secrets are not stored in the docker images but are added through the Kubernetes environment.
You can take the default passwords or, modify them in the secrets.yaml file.
Apply the Secrets/Configuration Files and Launch the Pods
|
Note
|
After running apply.sh, not all pods will correctly start, this is NORMAL! The DNS CNAME entries have not been configured yet and the services that requires DNS name resolution will fail. |
In your Cluster Admin Shell and from the specs directory run the following:
./apply.shAfter a few minutes, most of the pods will have started, but some will be failing. Don’t Panic!, the DNS CNAME entries have not yet been completed, this is normal. This will be described in the next section.
kubectl get podsNAME READY STATUS RESTARTS AGE
younite-api-0 0/1 CrashLoopBackOff 2 (15s ago) 3m21s
younite-data-virtualization-service-0 0/1 CrashLoopBackOff 4 (34s ago) 3m20s
younite-db-0 1/1 Running 0 14m
younite-elastic-0 1/1 Running 0 13m
younite-keycloak-d9ffd9595-tqxzv 1/1 Running 0 20m
younite-kibana-5dc8d6c6c7-v2xp4 1/1 Running 0 20m
younite-logstash-5c4c547f7b-b7lc2 1/1 Running 0 20m
younite-mb-0 1/1 Running 0 14m
younite-notification-mb-0 1/1 Running 0 12m
younite-notification-service-0 0/1 CrashLoopBackOff 4 (8s ago) 3m20s
younite-notifications-db-0 1/1 Running 0 10m
younite-ui-79d7c486b6-pp94g 1/1 Running 0 20mConfiguring DNS CNAME Entries
|
Note
|
The following steps cannot be completed until the AWS Certificate requested in the Create an AWS Certificate section above has been issued and kubernetes services created in Apply the Secrets/Configuration Files and Launch the Pods. |
Add Records to the Organization’s DNS CNAME Map
Several YOUnite services create AWS load balancers and the address of each load balancer needs to be added to your organization’s DNS CNAME map.
Either, add these entries to your organization CNAME map through your domain registrar or make a request to the appropriate entity in your organization.
Before Getting Started
-
For the following CNAME entries, sub_base_url is the portion of the
base_urlused in the cluster configuration without the organization’s domain name.For example if
Basename URL(stored in yoursecret place) is:younite.my-company.comthen
sub_base_urlis:younite
Records to Add to the CNAME Map
Retrieve the external IPs for each load balancer
The external IPs for each kubernetes service can be retrieved with the following command. The EXTERNAL-IP value is what will be used as the value for each CNAME
entry added.
kubectl get services -o=custom-columns="NAME:.metadata.name,EXTERNAL-IP:.status.loadBalancer.ingress[0].hostname"NAME EXTERNAL-IP
kubernetes <none>
younite-api a338a393b6ca54d6995170429ea31eb9-694612804.us-west-2.elb.amazonaws.com
younite-data-virtualization-service a01234567890e4810b0a123456e696eb-123456789.us-west-2.elb.amazonaws.com
younite-db <none>
younite-elastic <none>
younite-keycloak aa27dcf9d428d410a80b331bc2a74de3-900462283.us-west-2.elb.amazonaws.com
younite-kibana a00987654321e4810b0a654321e696eb-987654321.us-west-2.elb.amazonaws.com
younite-logstash <none>
younite-mb <none>
younite-notification-mb <none>
younite-notification-service a058906115b2e4810b0a694960e696eb-549814555.us-west-2.elb.amazonaws.com
younite-notifications-db <none>
younite-ui ab5c8e55780c04835a57c974a4ab1aed-2048333784.us-west-2.elb.amazonaws.comYOUnite Service CNAME
After retrieving the external IP of each service above, configure the following CNAME entries.
YOUnite User Interface
Host Record |
Value |
Example Host Record |
Example Value |
ui. |
External IP of |
ui.younite |
ab5c8e55780c04835a57c974a4ab1aed-2048333784.us-west-2.elb.amazonaws.com |
YOUnite Server - younite-api
Host Record |
Value |
Example Host Record |
Example Value |
api. |
External IP of |
api.younite.my-company.com |
a338a393b6ca54d6995170429ea31eb9-694612804.us-west-2.elb.amazonaws.com |
YOUnite Notification Service
Host Record |
Value |
Example Host Record |
Example Value |
notifications. |
External IP of |
notifications.younite |
a058906115b2e4810b0a694960e696eb-549814555.us-west-2.elb.amazonaws.com |
YOUnite Data Virtualization Service
Host Record |
Value |
Example Host Record |
Example Value |
dvs. |
External IP of |
dvs.younite |
a01234567890e4810b0a123456e696eb-123456789.us-west-2.elb.amazonaws.com |
Keycloak
Host Record |
Value |
Example Host Record |
Example Value |
idp. |
External IP of |
idp.younite |
aa27dcf9d428d410a80b331bc2a74de3-900462283.us-west-2.elb.amazonaws.com |
Kibana
Host Record |
Value |
Example Host Record |
Example Value |
kibana. |
External IP of |
kibana.younite |
a00987654321e4810b0a654321e696eb-987654321.us-west-2.elb.amazonaws.com |
You will need to wait for the DNS entries to be pushed out. Once they are available to your local system, you can login to the YOUnite UI.
Login to the YOUnite UI
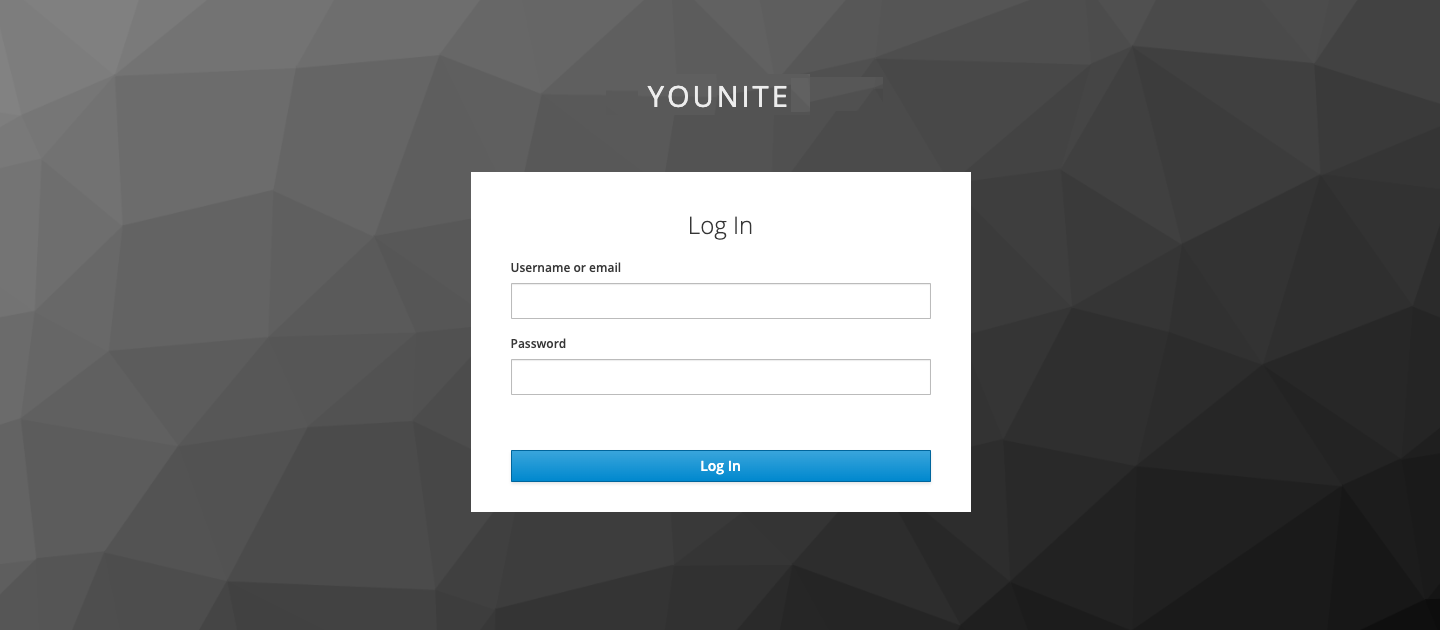
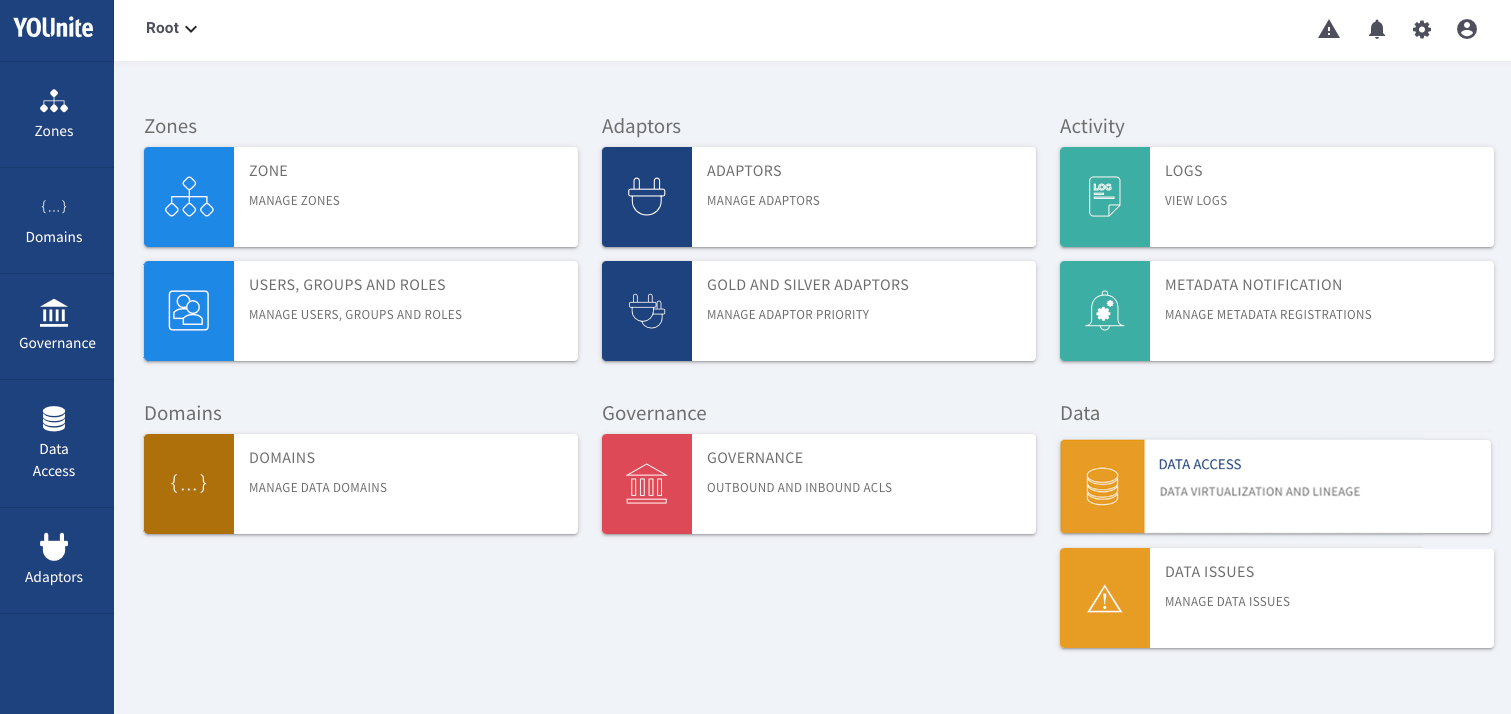
Once the DNS CNAME records have been pushed out, you should be able to access the YOUnite UI through the /login endpoint:
e.g. if you used younite.my-company.com as the base_url then use the following:

Login using the admin or dgs username with the default password password.
Gaining Access to the Kubernetes Dashboard
|
Note
|
See the Kubernetes documentation on Accessing the Kubernetes Dashboard for the ultimate reference. |
Enable the Dashboard
In your Cluster Admin Shell, enable the dashboard for your cluster by running the following:
kubectl apply -f https://raw.githubusercontent.com/kubernetes/dashboard/v2.5.0/aio/deploy/recommended.yamlCreate a Dashboard User for the Cluster Administrator
In your Cluster Admin Shell, create a Kubernetes service dashboard account for the cluster administrator:
kubectl create serviceaccount dashboard-admin-sa
kubectl create clusterrolebinding dashboard-admin-sa --clusterrole=cluster-admin --serviceaccount=default:dashboard-admin-sa
Make sure it was created:
kubectl get secretYou will see the dashboard-admin-sa name appended with a token for example:
NAME                             TYPE                                  DATA   AGE
api-secrets                      Opaque                                10     8d
dashboard-admin-sa-token-f4wlg   kubernetes.io/service-account-token   3      25h
default-token-cbvfx              kubernetes.io/service-account-token   3      9d
younite-registry                 kubernetes.io/dockerconfigjson        1      24h
Retrieve the secret using the NAME from above, and store the token it returns in your safe place as Kuber token. This will be needed to login to the Kubernetes dashboard:
For example:
kubectl describe secret dashboard-admin-sa-token-f4wlgTo retrieve just the token use the following:
kubectl describe secret dashboard-admin-sa-token-f4wlg | awk '$1=="token:" {print $2}'Access the Dashboard
You can access the cluster directly using a rather long URL or use a shorter URL in conjunction with a proxy.
Access Directly
Run the following to get the IP address of your Kubernetes cluster:
kubectl config viewLocate the cluster.server value e.g.:
https://api-my-company-younite-k8s-local-vdq7ta-853038723.us-west-2.elb.amazonaws.comSave it to your save place as Cluster URL.
Then, concatenate it with this URL segment:
/api/v1/namespaces/kubernetes-dashboard/services/https:kubernetes-dashboard:/proxy/To form the fairly lengthy URL - navigate to this URL with your browser:
https://api-my-company-younite-k8s-local-vdq7ta-853038723.us-west-2.elb.amazonaws.com/api/v1/namespaces/kubernetes-dashboard/services/https:kubernetes-dashboard:/proxy/Access Using a Proxy
Start a local proxy:
kubectl proxyNavigate to this URL with your browser:
http://localhost:8001/api/v1/namespaces/kubernetes-dashboard/services/https:kubernetes-dashboard:/proxyLogin to the Dashboard
Two login screens are needed to gain access:
Run this command again. The username and password are needed for the first screen. Save these in your safe place as Kuber user/pass:
kubectl config view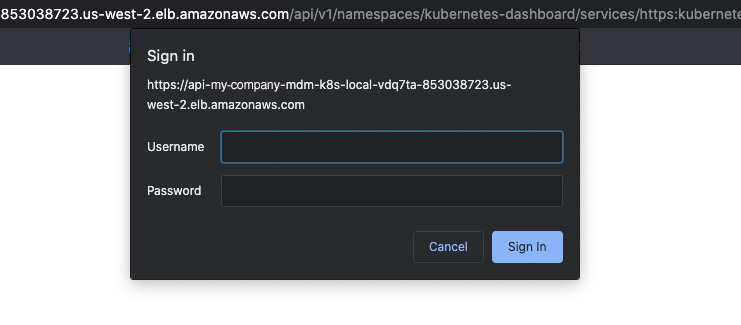
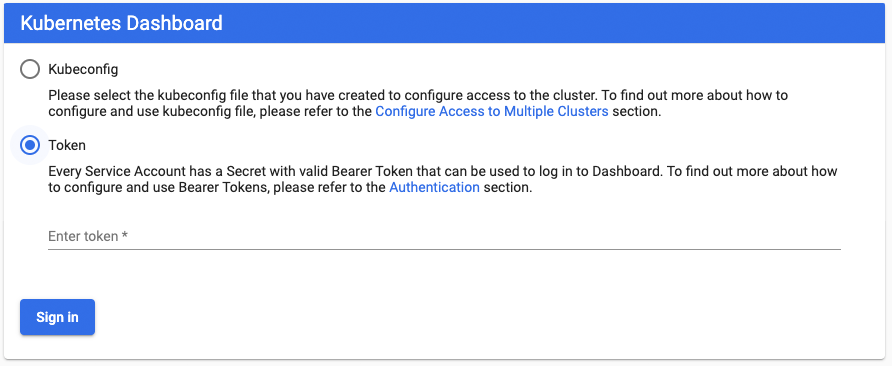
Next, the Kubernetes Dashboard access screen will be presented:
-
Select
Token -
Copy-and-paste the
Kuber tokenstored in yoursafe placethen selectSign in:
If all went according to plan, the Kubernetes Dashboard should be presented:
All deployments should be green. If they aren’t they just need more time to startup or there may be errors. Contact your YOUnite representative or integrator.
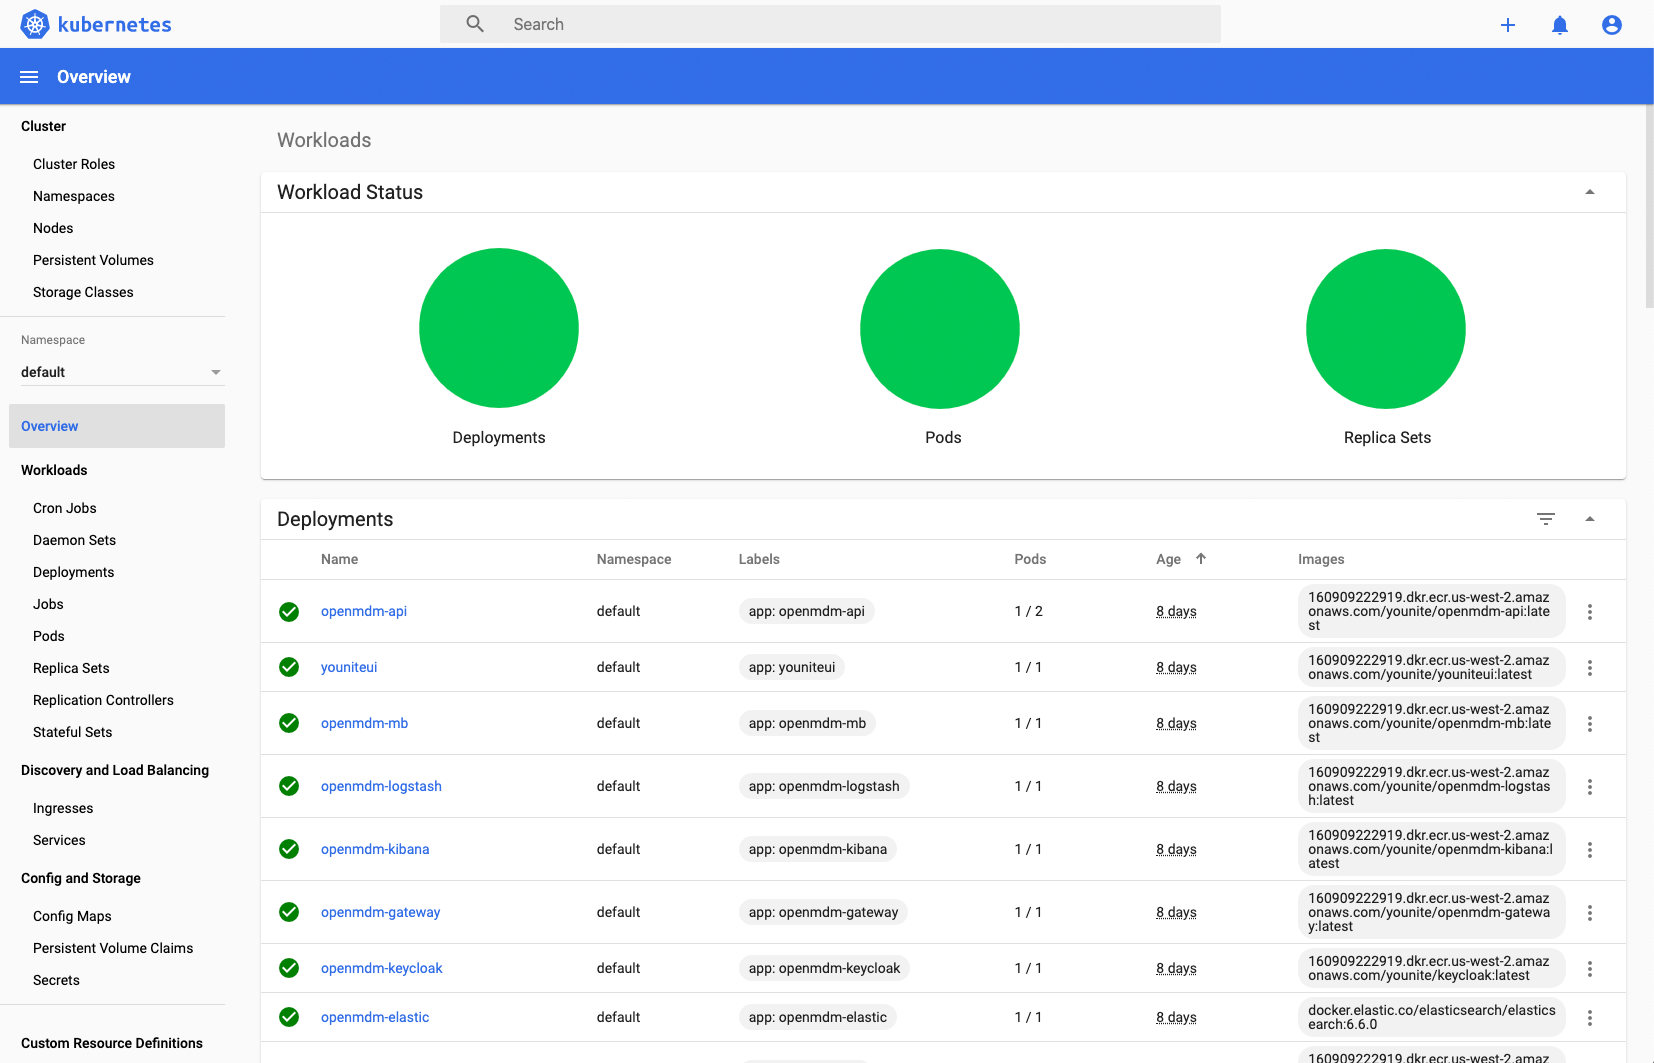
If the Dashboard does not remain active it will be logged out and a new token will have to be created to login again.
See the Kubernetes Documentation for the ultimate reference on how to manage the cluster.
Update, Suspend, Shutdown or Delete the Cluster
You may want to suspend your cluster and pick up work on it on another day.
To suspend, update, shutdown or delete the cluster see the Update, Suspend, Restart or Delete the Kubernetes Cluster guide.
Next Steps
The next steps are to create zones, users/groups, data domains and adaptors. These are covered in the First Steps for YOUnite Admins and Data Governance Stewards guide.